Showing posts with label blue. Show all posts

Monday, December 1, 2014

FREE PRINTABLE CHRISTMAS CARDS


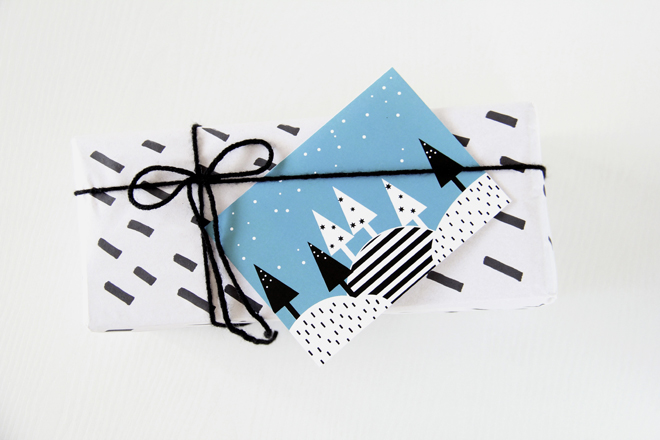
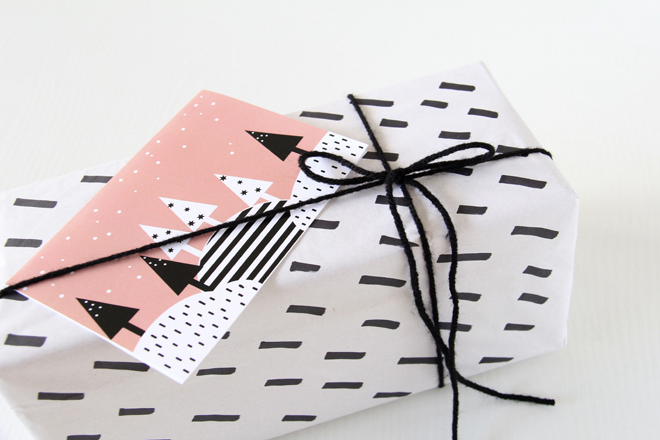
With Christmas just over three weeks away, it’s time to get the Christmas cards ready for posting.   Normally, we buy whatever we can grab at the nearest store and send them off at the last minute in hopes that they will arrive in time.  My parents in South Africa probably get theirs sometime in January (but they are too sweet to complain).  This year, however, I’m better prepared.  I’ve designed my very own printable Christmas cards, which I’d like to share with you.  There are three variations of the cards, peach, pink and teal.  Personally I like the teal, while my husband prefers the pink.  Which one do you like?

P.S.: My nursery décor and toy sale ends tonight.  Use the code “FESTIVE15” to receive 15% off all store merchandise.  Feel free to browse my store here.  Have a great week! Nicole


Please note: These cards were designed by me and should not be altered in any way without my consent.  They are for domestic use only and cannot be used for commercial purposes. Thank you.

Wednesday, September 3, 2014

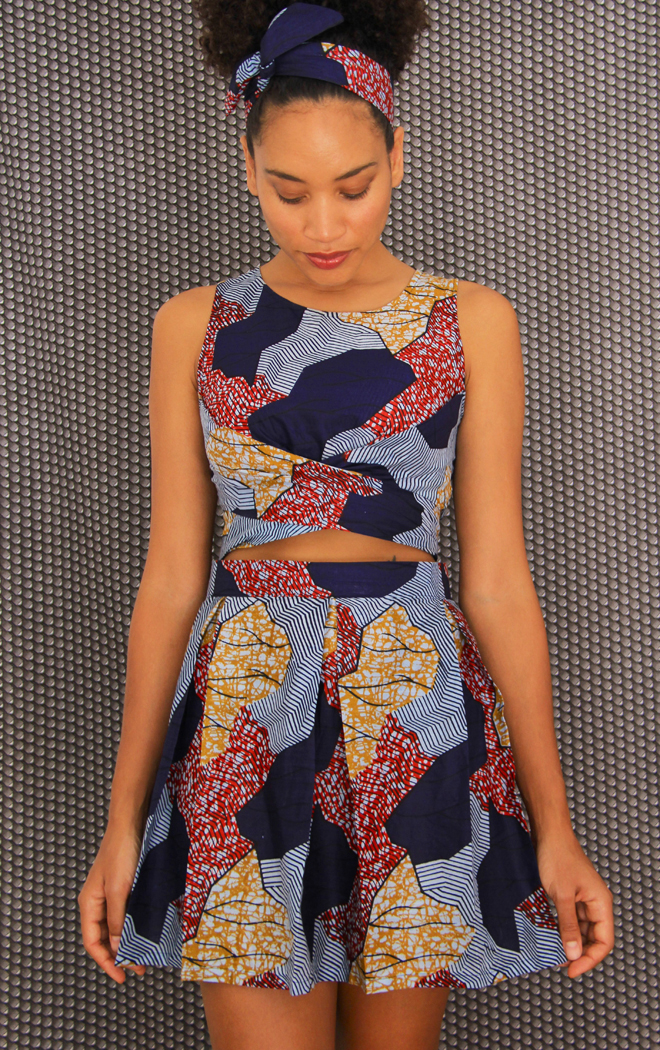
AFRICAN PLEATED SKIRT DIY


It’s funny how words can transport one back in time.  The words “Out of Africa” remind me of a day in the mid-80s when, as a child in Cape Town, I was dragged to a store by the same name to buy my first African printed skirts and dresses.  Even in racially charged apartheid South Africa, the film “Out of Africa” (which starred Robert Redford and Meryl Streep) encouraged a romanticization of all things African.  While the film is deeply problematic in its portrayal of African people, the store “Out of Africa” introduced me to the beautiful designs of my continent.

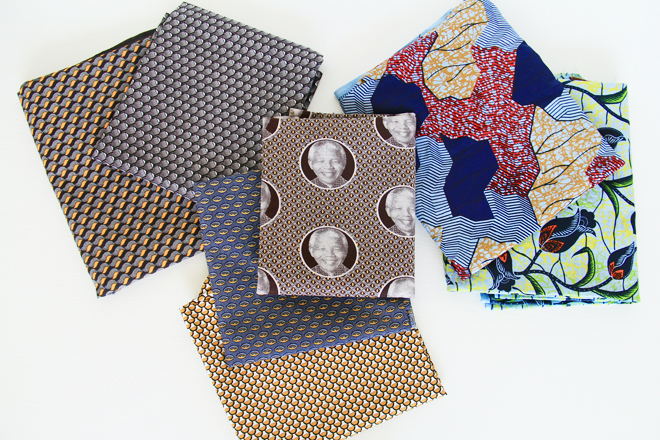
It would take nearly thirty years before I would fully appreciate African fabrics again in all their colourful, sometimes psychedelic glory.  On my last trip to Cape Town I decided to stock up on a few West African wax prints and South African shweshwe.  At $2 - 5 a yard, I am still kicking myself for not filling a suitcase with fantastic fabric!  


Of course, a short pleated skirt may not be Fall-appropriate everywhere, but here in San Diego we have been experiencing near 100F weather.  This, coupled with the fact that our home has no air conditioner, encouraged me to make use of some of my African print fabric.  The top was made using my wrap crop top pattern. 

Materials:
1.5 – 2 yards of fabric (here’s a link to sellers of African fabric on Etsy)
Matching thread
9” invisible zipper
Interfacing (optional)
Sewing machine
Pins
Ruler
Chalk
Scissors


Method:
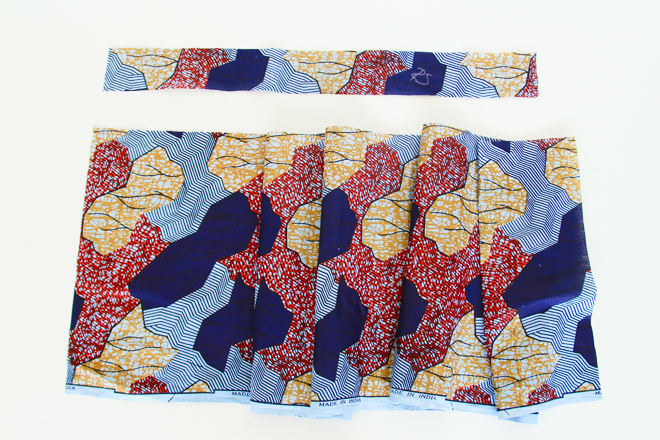
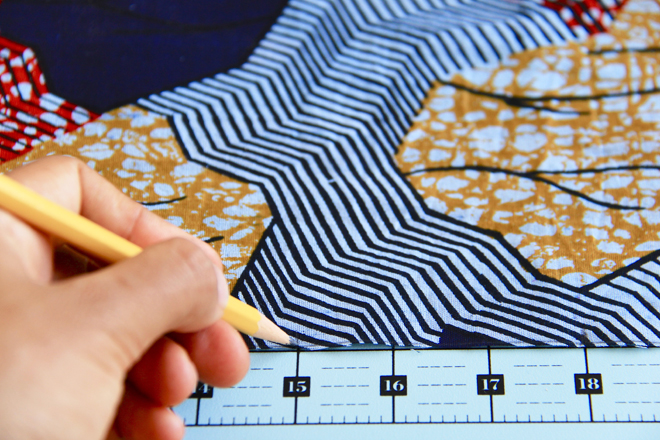
1] Decide how long you would like your skirt and add 1.5” for seam allowance.  Cut fabric to desired length.  I wanted my skirt to end mid-thigh, so cut my fabric at 17.5”.
2] For the waistband, cut a 4” strip of fabric to fit your waist + 2” seam allowance.

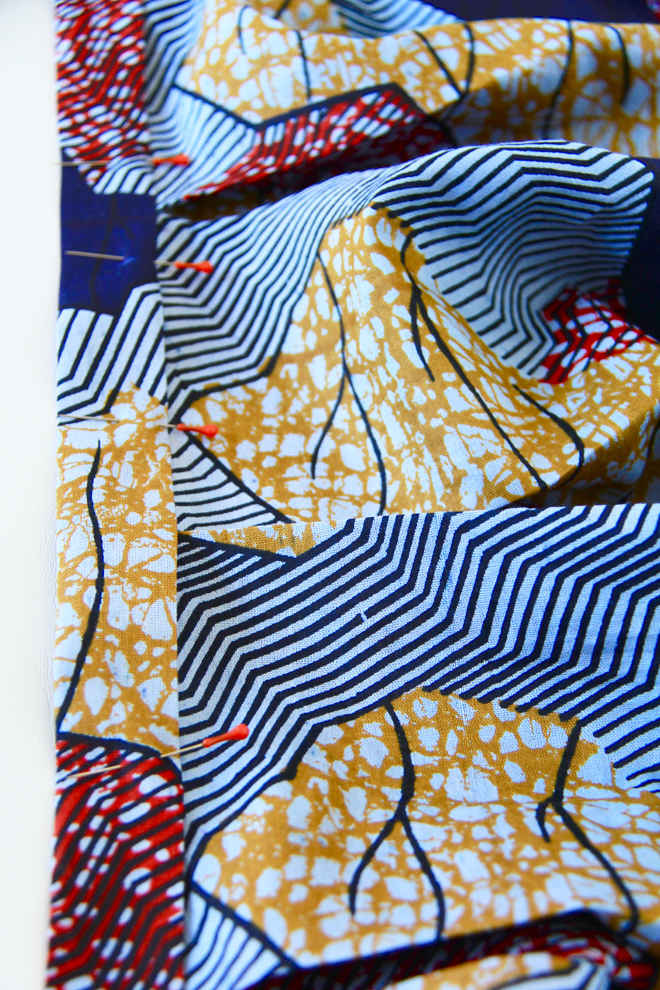
3] Mark and pin the pleats.  Baste the pleats into place along the waistline.

4] Fold the waistband in half and iron.
5] Fold all raw edges of the waistband ½” towards the center of fabric and iron in place.  If you're using a soft fabric, I suggest using some interfacing to prevent the waistband from collapsing.
6] Sandwich the top of the skirt between the waistband.  Pin and sew in place.

7] Insert the invisible zipper.  I found this Youtube video on how to insert an invisible zipper pretty handy.
8] Finish sewing the side seam, making sure to secure the base of the zipper.
9] Hem your skirt.


Please feel free to leave any questions/comments below. I do so love hearing from you. J  If you enjoyed this tutorial please share the love by liking The Felted Fox on Facebook. Also, don’t forget to subscribe to or follow The Felted Fox on Bloglovin to receive free tutorials and patterns to your inbox.

Happy sewing!  Till next time. Nicole.

Thursday, July 24, 2014

WRAP CROP TOP DIY


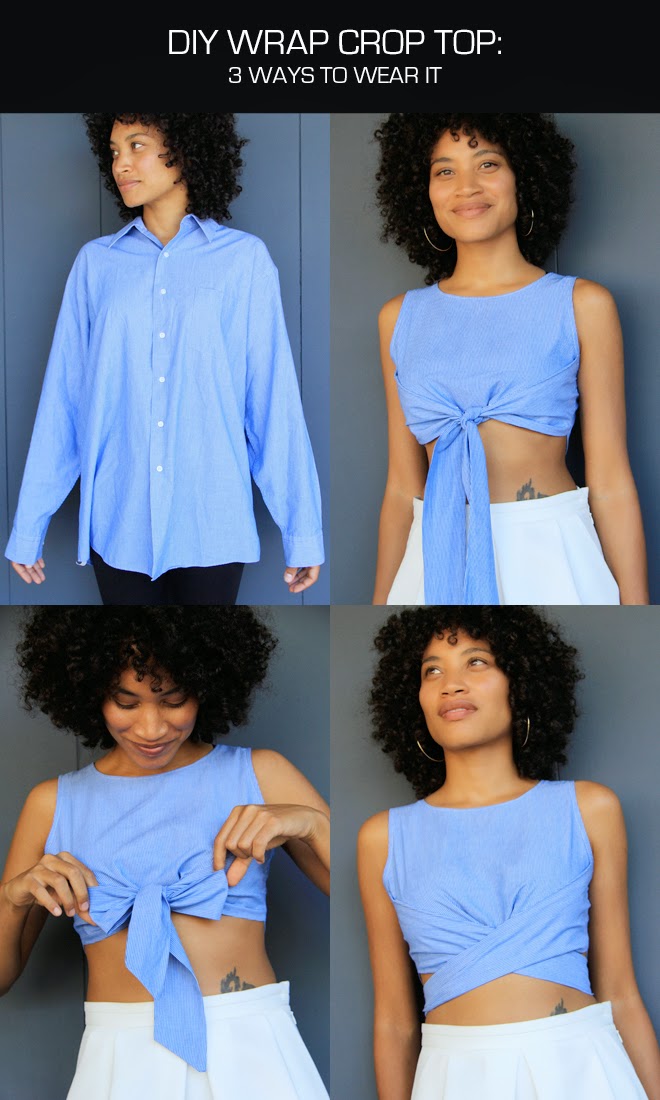
Jeremy and I have finally returned from our four-month stint in Europe.  While I’ll miss the travelling, excellent food and magical sunsets, it’s always good to come home to San Diego—and all my crafting supplies.  Contrary to most peoples’ European adventures, I usually return with an empty suitcase.  I get so tired of lugging a heavy suitcase around that I donate most of my clothes to charity along the way.  So, left with only a few items of summer clothing, I decided to start sewing my own clothes.  
This wrap crop top is perfect for summer.  The crop top can be worn 3 different ways: knotted in front; tied in a front bow; (or my personal favorite) wrapped around the body and tied at the back.  It’s the first garment I’ve ever made from scratch and without a pattern.  I harvested fabric from a second-hand men’s shirt, sized large (I love a good recycle project!).  This wrap crop top pattern will fit a U.S. size 2-4.


Materials:
My free wrap crop top pattern (includes sewing allowance, print at 100%)
Men’s large shirt / 1 yard of fabric
Matching thread
Pins
Scissors
Sewing machine

Method:
1] Print and cut out templates.
2] Cut out your fabric pieces, as well as 3 long bias strips.


3] With right sides facing sew the shoulder seams at ½ “
4]  Fold the front bottom edge ¼ “ and iron flat. Repeat and sew edge. Sew the back bottom edge the same way.

5] Fold the front angled edge ½“ and iron flat.

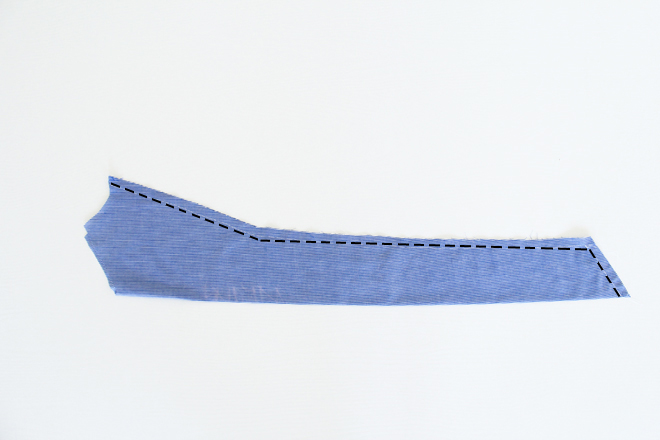
6]  With right sides together, sew the side panels at ½“.  Leave the side seam open.

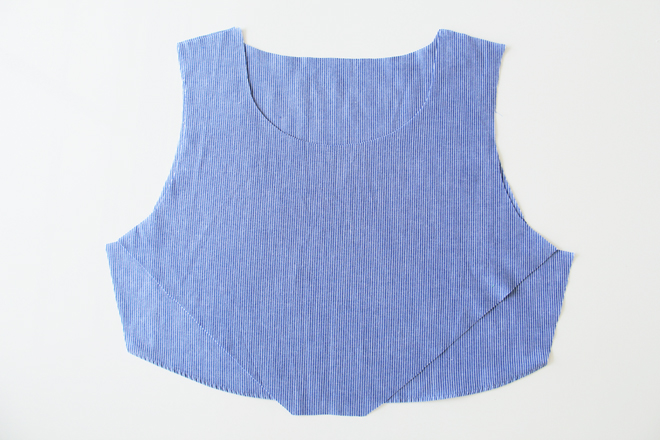
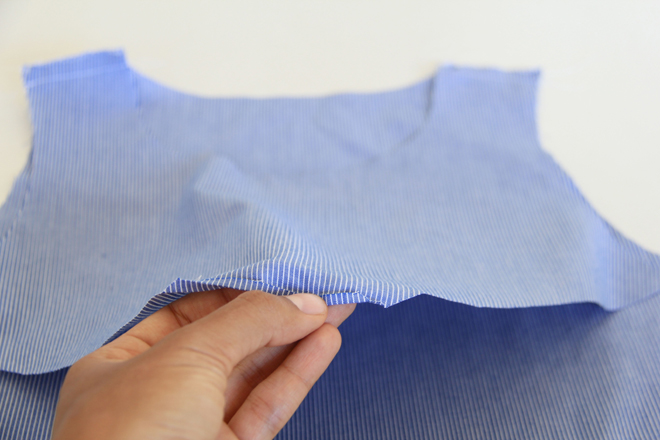
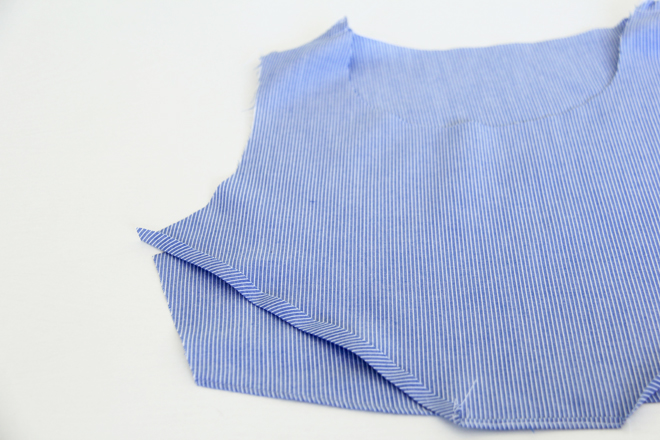
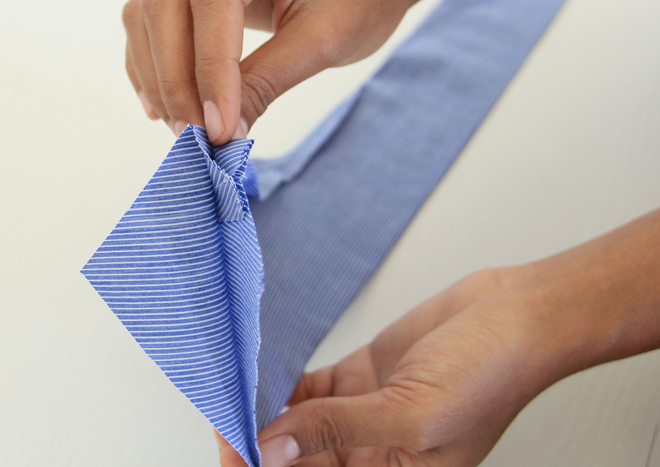
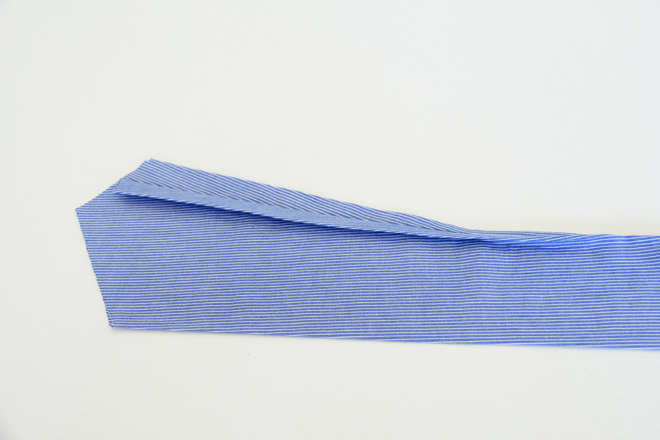
7] Turn the side panels right side out. Fold the top seam of your side panel about an inch towards the center, creating 2 ridges. Do this for approximately 9”, tapering the fold as you go.  Iron flat.

8] Fold one ridge of the side panel down and iron. Do this on opposing sides to create the left and right panel. The flap that is ironed down will be sewn on the inside of the top. I hope my images help to explain this step.

9]  Pin the side seams of the side panel and the back of top together. Sew.
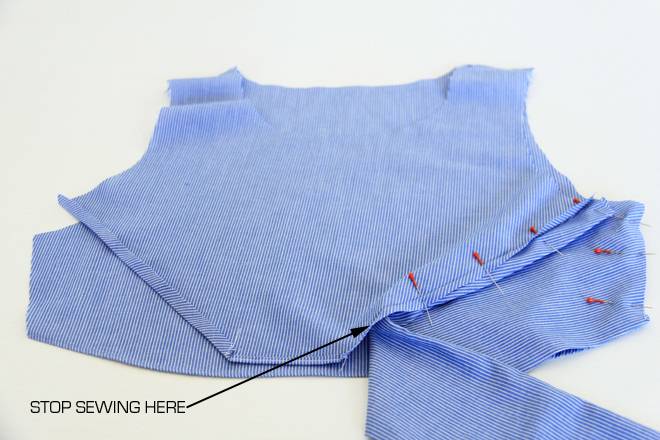
10] Pin the turned down edge of the side panel to the front of the top. Sew to ½” from bottom edge.  Make sure not to sew through the front of the side panel. 

11] Finish the neckline and armholes with bias tape and any raw edges with a zigzag stitch.


This is a really fun little crop top, which I definitely be wearing all summer long.  I’ll be making a few more garments for summer and fall, so stay tuned.

Also, don’t forget to subscribe or follow on Bloglovin to get free patterns and tutorials in your inbox.  You can also share the love by liking The Felted Fox on Facebook.

Have a great day and thanks for stopping by, Nicole. 


Wednesday, July 10, 2013

HEXAGONAL TRIVETS DIY


Who knew I would love power tools?  For years my dad worked as a carpenter.  I never thought to ask him how to build things since I figured he would always be there if I ever needed a cabinet or shelves.  So, after relocating to San Diego I found myself in trouble: my dad was in Cape Town, my husband hated home improvement and we had a house that needed a lot of upgrades.  I needed to find someone handy with a saw.  The solution (after much deliberation) was for me to take a carpentry class.  When I enrolled last spring I could have never guessed how much I would love it.  Now, my husband and I have dreamed up so many projects that I’ll need years to finish them all!

These plywood hexagons were originally cut for a project at the hubster’s office (more on that later).  They had been lying in a corner for a few weeks—like many of my projects seem to do—while I contemplated the next step.  With a friend having recently purchased a house, I knew I’d have to come up with a good house-warming gift.  I hit on the idea of using some of the hexagons to make trivets.  I think they are hip, pretty and fun, just like their soon-to-be owner. 

NOTE: These instructions are for making plywood hexagons.  If you have never used a saw (and you don’t want to lose any fingers!), try making the trivets out of cork.  All you’ll need is a utility knife.  

What you’ll need:
¼” or ½” Plywood (at least 10” x 10” for each trivet)
Pencil
Compass
Ruler
Table saw
Miter saw
Sealant (linseed oil or beeswax)

Optional:
Acrylic paint
Painter’s tape
Paintbrushes
Plastic containers

Step 1:  
Draw a hexagon on the plywood. 
The easiest way I found to do this was to use a compass.  Set the compass to a radius of 5” (or larger for a bigger trivet) and draw a circle.  Don’t change the angle of the compass.  Mark a beginning point (A) along the circle. Place the point of the compass on A and mark a second point (B) 5 inches away from A along the circle.  Make sure that a line drawn between point A and point B is parallel to the edge of the plywood.  Continue moving the compass point to the new mark along the circle in order to mark all 6 points of the hexagon.  Once you have all the points marked, connect the dots to create the hexagon. 

Step 2:
Use the table saw to rip (cut with the grain) the wood along the top and bottom of the hexagon.

Step3:
Crosscut the plywood with the miter saw along the outer edge of the hexagon.  

Step 4:
Set the miter saw to 30 degrees and cut the remaining sides of the hexagon.


TIP:  Use the first hexagon as a template to draw the rest.  That way they will all be the same size. 

Step 5:
If you like the natural look, seal the trivet with linseed oil/beeswax to prevent staining. 
To add some colour and designs to the trivet, use acrylic paint and tape before sealing.

Happy crafting!  Nicole

 
UA-39822949-1