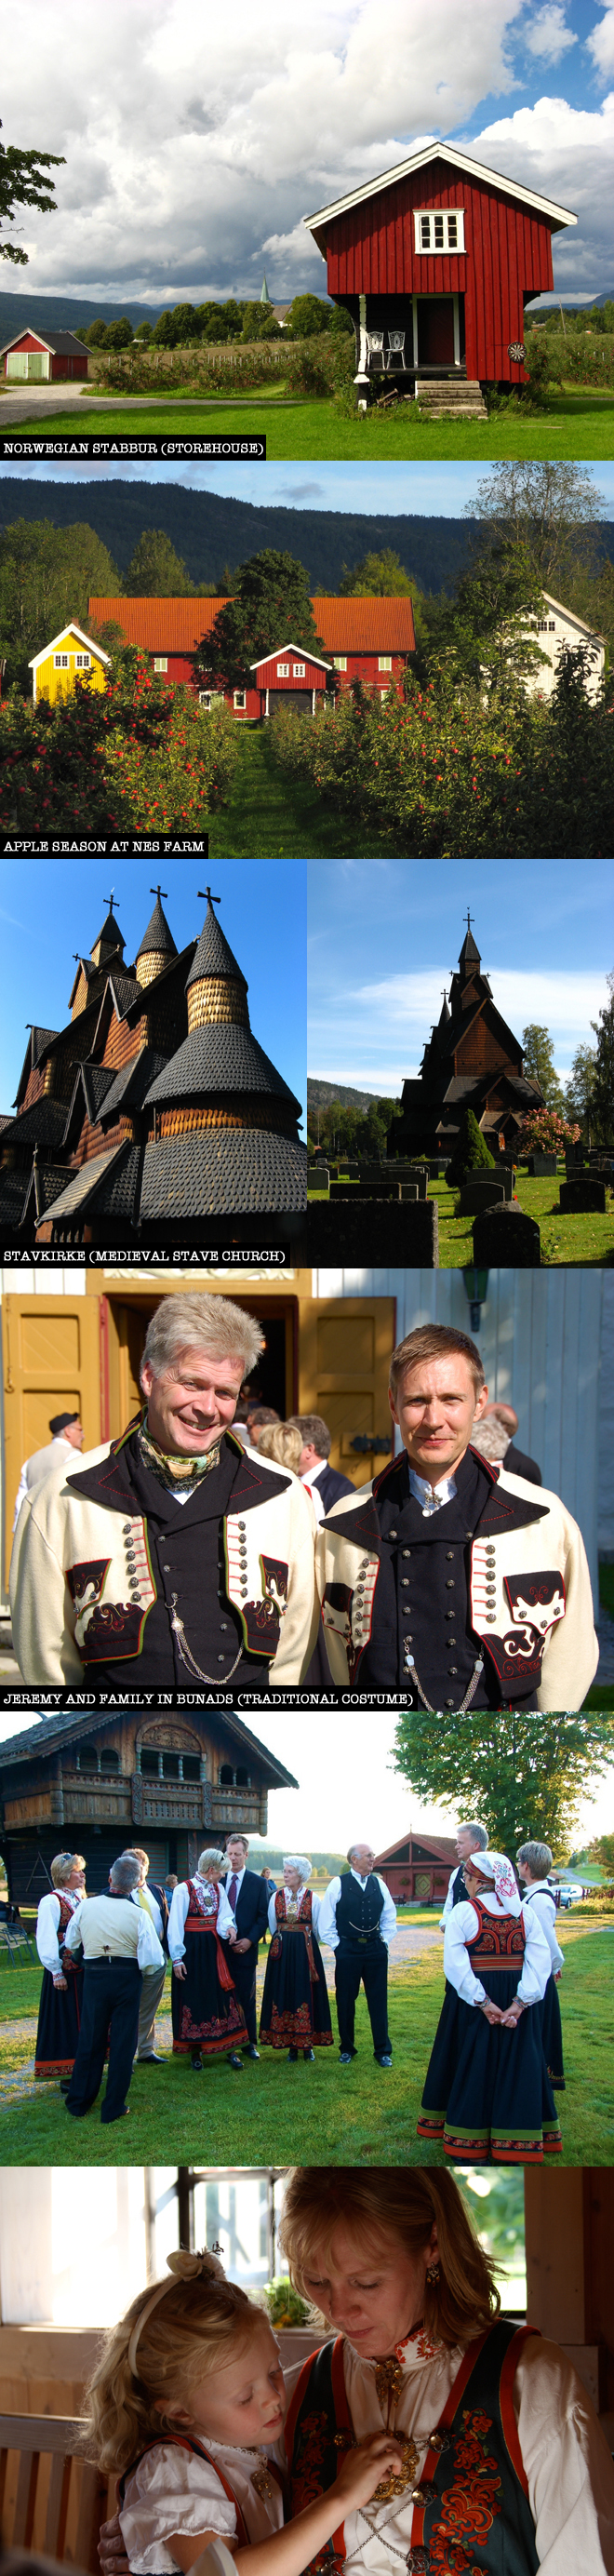
Jeremy recently traveled
to Norway to visit his family. We
usually try to make the trip together during the summer, but given my work
schedule this year I couldn’t take the time off. I love these family pilgrimages - staying on
the organic apple farm, picking wild berries, swimming in the lake and watching
the midnight sun. Visits also always include
pulling out family photographs, apple cider and wonderful homemade cakes! His family members are among the most
welcoming and loving people I have ever met.
Though I couldn’t visit
Norway this year, I wanted to send along a few small gifts for cousin Tone’s adorable
little girls. As a wildlife biologist, I
am always looking for ways to bring nature into my designs (if I had my way our home would be filled with animal figurines, wildlife-themed tea towels,
duvet covers, and much more!). Having spent much of my early career working
with leopard populations in South Africa, I have a particularly soft spot for
predators.

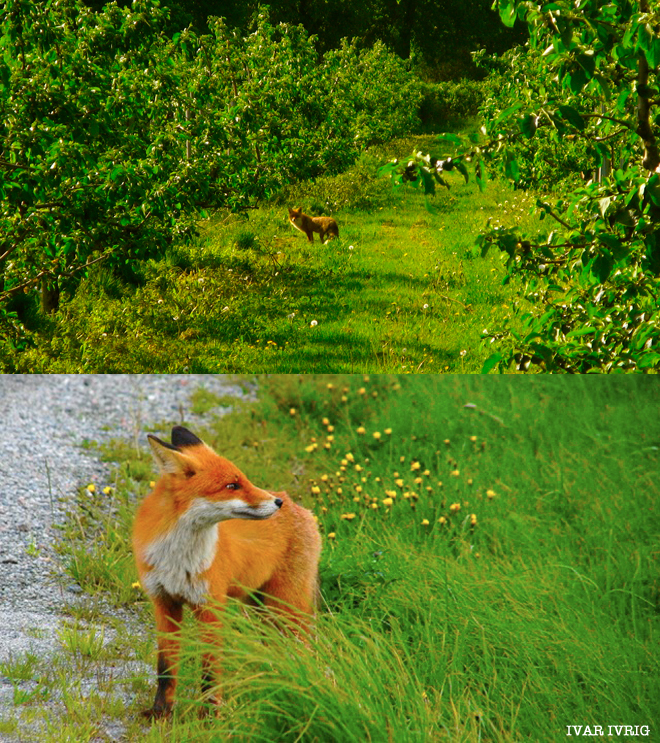
On previous visits to
Norway, Jeremy and I had seen beautiful red foxes on the family farm. Although still widely regarded as pests and
persecuted for their pelts, red fox populations in Scandinavia suffered their
most drastic decline in the 1970’s and 80’s, due to the spread of mange. Thankfully, populations have now largely
recovered, and I was delighted to see these beautiful creatures frolicking in the
apple orchards. They are amazing to
watch: graceful, fast and usually very shy.
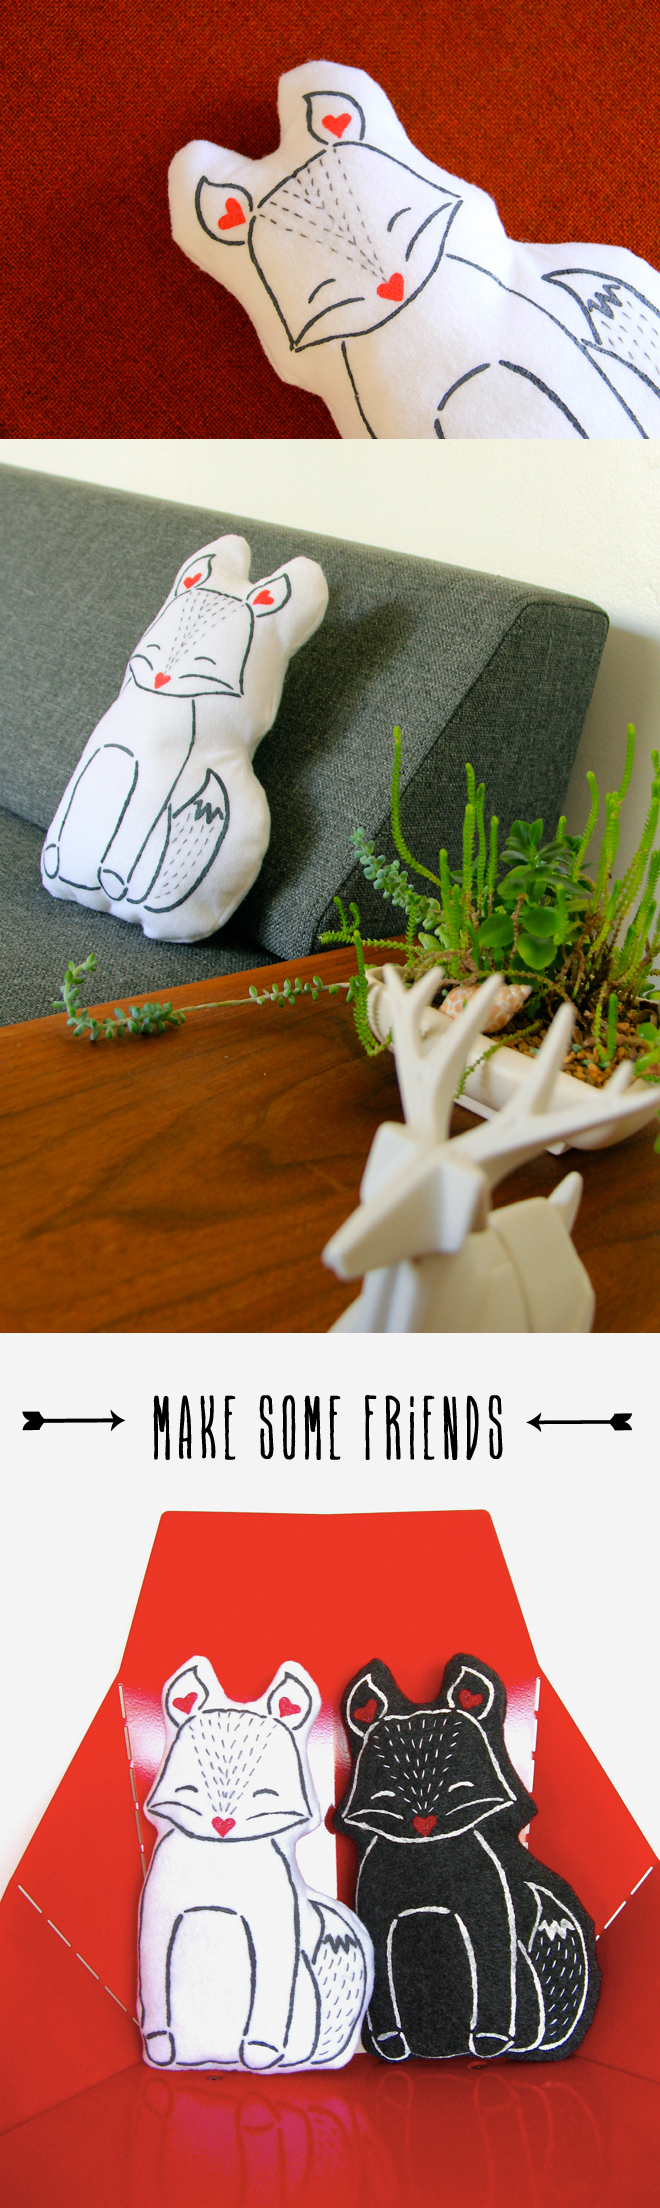
As I wanted to share a bit of my passion for wildlife with Tone’s little
girls, I decided to make felted fox pillows.
Hopefully, the girls will grow to admire the breathtaking nature that
surrounds them—especially the foxes—as much as I do.
 To make your own felted
fox, you will need:
To make your own felted
fox, you will need:
Inkjet printer
Freezer paper
X-acto knife
Cutting mat/board
White felt 15” x 22”
Non-toxic fabric paint
in grey and red
2 Paintbrushes
Iron
Sewing machine (the
pillow is also small enough to be hand sewn)
Sewing needle
Thread in white and grey
Polyester fiberfill
(small bag)
NOTE:
this pattern is for domestic use only and cannot be used commercially or
sold.
Step 1:
Print pattern directly
on to 2 sheets of A4 sized freezer paper. Make sure to print the pattern on the
matt side. Place a cutting board
underneath the freezer paper and cut out solid black lines.
Step 2:
Place freezer paper
shiny side down on to the felt and using a dry iron, adhere freezer paper to
felt.
Step 3:
Using small paintbrushes,
paint over stencil. I used grey fabric paint to outline the body and red to
fill in hearts.
Step 4:
Once the fabric paint
has dried, cut the felt along dotted line and remove freezer paper. Use the
front piece as a template to cut back of fox pillow.
Step 5:
With right sides facing,
sew a ½ “ seam, leaving an opening at the base of pillow wide enough to fit you
hand through.
Step 6:
Trim excess felt around
ears and tail. This will allow the
pillow to curve more easily. Turn pillow
right side out.
Step 7:
Use grey thread to add a
few running stiches along face and tail of fox pillow.
Step 8:
Stuff pillow and sew
base.
Your felted fox pillow is
now ready to put a smile on a little face.
For those who are
interested in experiencing the Norwegian countryside, the stabbur (first image
of Norway) has been converted into a rental cottage. Visit grenske.no for
more information.
If you have any
questions/comments or would like to send photos of your finished foxes, please
leave a note in the comments section or send me an email. I’d
love to hear from you, Nicole.